 |
|
| TheExcelAddict.com | |
| February 27, 2020 | |
| Hi fellow Excel Addict, | |
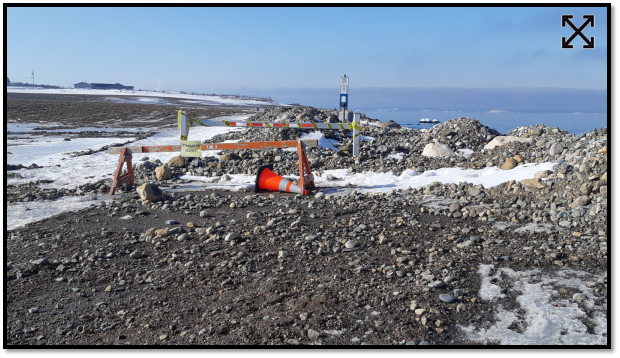
| I went for a walk by the ocean a couple of days ago. As you can see in this picture, Mother Nature put on a spectacular display... ...however, sometimes she can unleash her spectacular and destructive fury. This bottom picture is only about 30ft away from the first picture and shows some of the severe storm damage that resulted from that huge winter storm we had back on January 17-18th. Ten kilometers of our world class, ocean side hiking trail (a.k.a. the T'Railway) was destroyed by the extremely high wind and waves in only a matter of 24 hours. This is going to take about $10 million dollars and many months to repair. Needless to say, I won't be running on this trail any time soon. Today's 'Excel in Minutes' tip is 'How To Print Multiple Nonadjacent Ranges'. If you like it, please share it on social media and with your colleagues or any other Excel users you know. And while you're at it, please recommend that they sign up for my newsletter. Thanks in advance. Have a great day and keep on Excelling, Francis Hayes (The Excel Addict) Email: fhayes[AT]TheExcelAddict.com |
|
|
|
|
|
|
|
| Missed my last newsletter? | |
Click Here to View it Online |
|
| |
|
Having a positive attitude can help us in difficult times. I hope today's quote will help you foster a positive attitude today. Quote of the Day "Be miserable. Or motivate yourself. Whatever has to be done, it's always your choice." -- Wayne W. Dyer -- |
|
|
If you have a favourite quote, send it to me
and I may post it in my newsletter.
|
|
THIS WEEK'S 'EXCEL IN MINUTES' TIP |
|
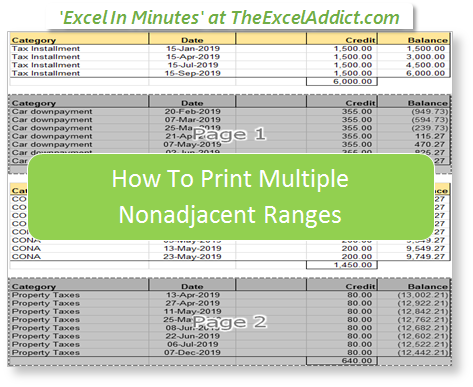
How To Print Multiple Nonadjacent Ranges |
|
|
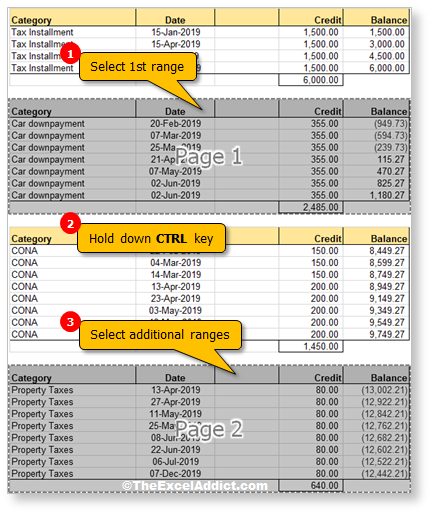
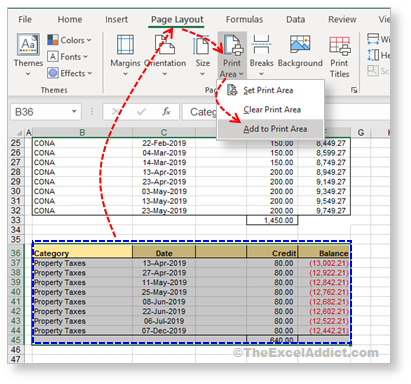
If we don't want everything on our worksheet to print, we can set a Print Area to tell Excel specifically what we want to print. In most cases, when we set the Print Area of a worksheet, it typically consists of a single range of cells with maybe some manual page breaks. However, sometimes we have worksheets that have multiple ranges that we want to print and other areas that we don't want to print. Many Excel users don't realize that they can include multiple nonadjacent ranges in a single Print Area. Here are two easy methods to do this. Quickly create a print area with multiple nonadjacent ranges My personal favorite method is to simply hold down the CTRL key while selecting the ranges I want to include in my Print Area. 1) Highlight the first range; 2) Hold down the CTRL key; 3) Highlight any additional ranges you want to include in the Print Area. 4) Release the CTRL key; 5) From the Page Layout tab, click Print Area, then click Set Print Area.  Note that each range you selected will print on a separate page and in the same order that you select them, regardless if it is above, below, right or left of any other selected range. Also, note that the current print settings will apply to all of these pages. For example, you cannot print some of your pages in Landscape and some in Portrait for the same Print Area... Add a new range to an existing Print Area This next method can be used when you already have a Print Area and you want to add another nonadjacent range to it. 1) Select a range you want to add to the existing Print Area; 2) From the Page Layout tab, click the Print Area then click Add to Print Area; 3) Repeat if you want to add other ranges.  As with the first method, each of these areas will print as separate pages, in the same order that they were added, and with the same print settings. Quickly locate the current Print Area To quickly locate the current Print Area, click the dropdown arrow in the Name Box to the left of the Formula bar and select print_Area.  Alternatively, from the View tab click Page Break Preview in the Workbook Views group. To return back to the regular view, click Normal. |
|
|
|
|
 |
|
|
|
|
|
|
|
| Disclosure: Some of the resources I recommend on my website and in my newsletter pay me a small referral commission if you purchase from them through links on my website or using my referral code. This helps offset the costs of my website. I've worked long and hard to build up my reputation online over the past 16 years as someone who provides exceptional value to my readers. So I'm not willing to risk that. As you know, I don’t just recommend anything. It has to be of outstanding quality and value. If you are EVER not completely satisfied with anything I recommend, please let me know and you will get your money...GUARANTEED. You can't lose. | |


